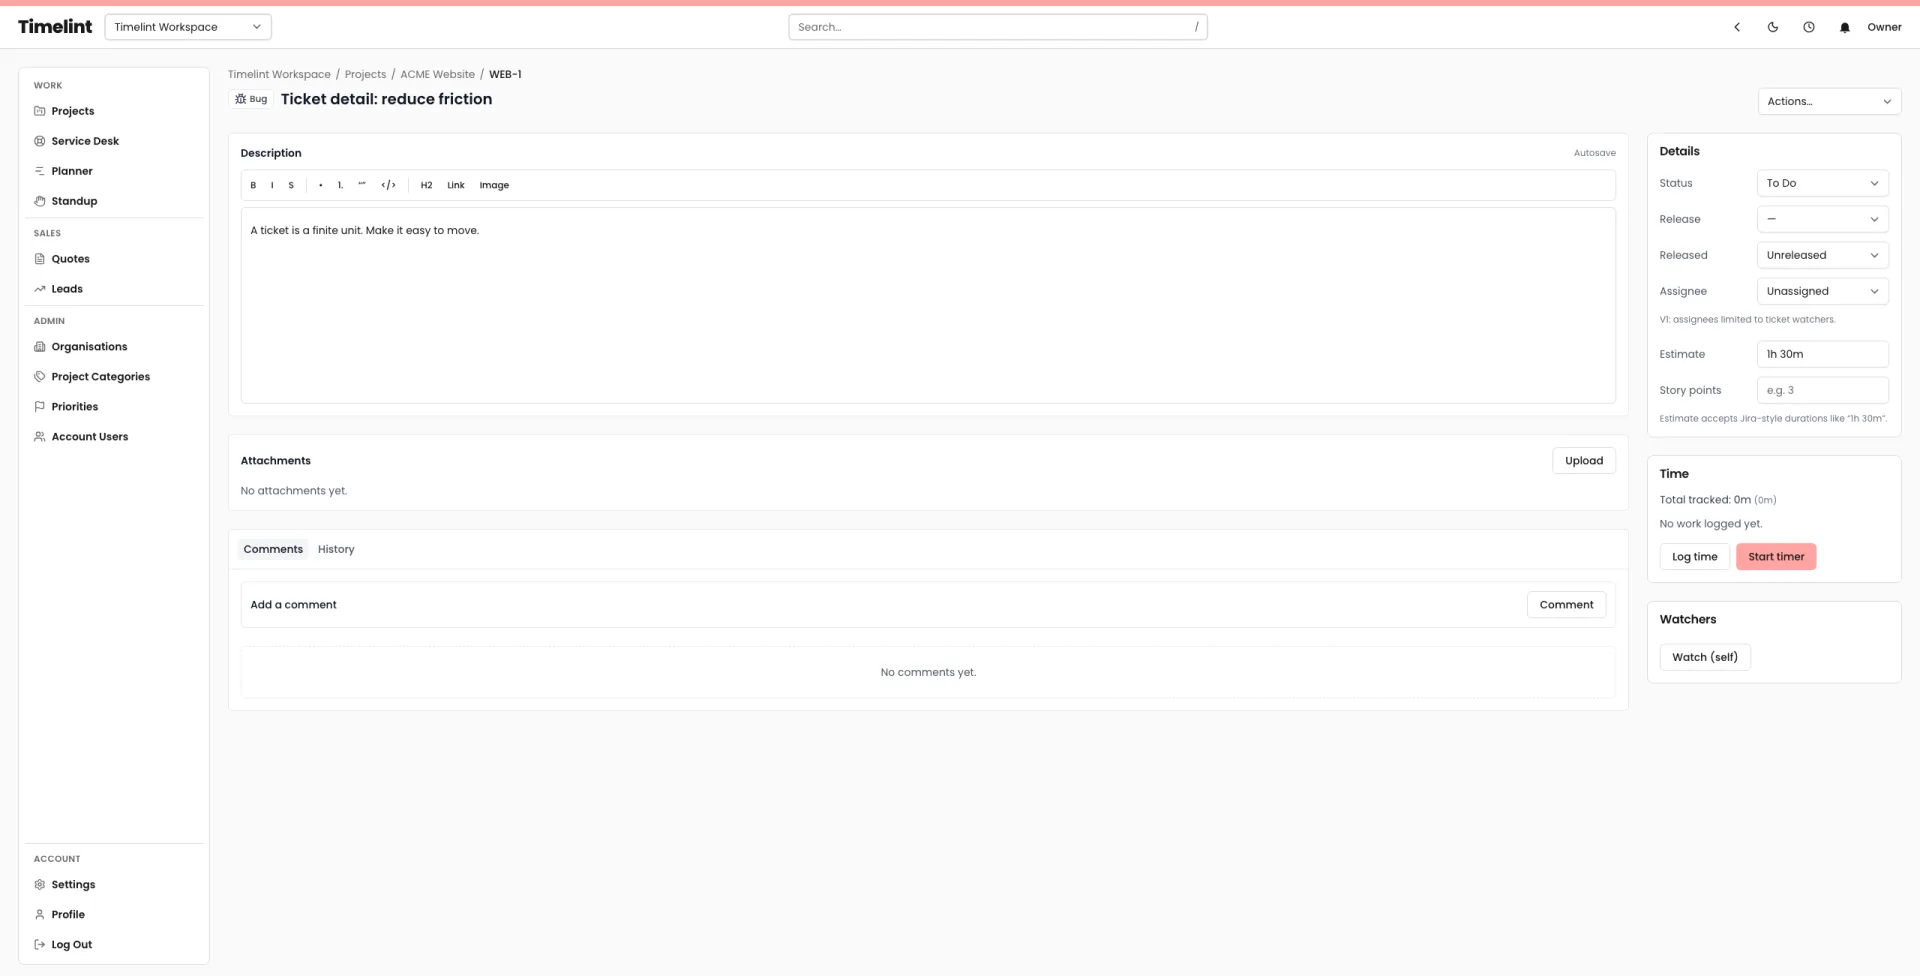
The goal of a Jira migration isn’t recreating Jira.
It’s keeping the ticket-first mental model and dropping the sprawl.
Import flow (what it looks like)
1) Connect Jira
Enter your Jira base URL and API token.
- If your Jira is on
atlassian.net, you’ll also need your Atlassian account email. - Timelint stores tokens encrypted after a successful test so re-imports are fast.


2) Select a Jira project (and optional JQL)
Load projects, pick which one to import, and optionally add a JQL filter to narrow the scope.


3) Choose the destination project
Import into a new project, or re-import into an existing project to pull over new/changed work.


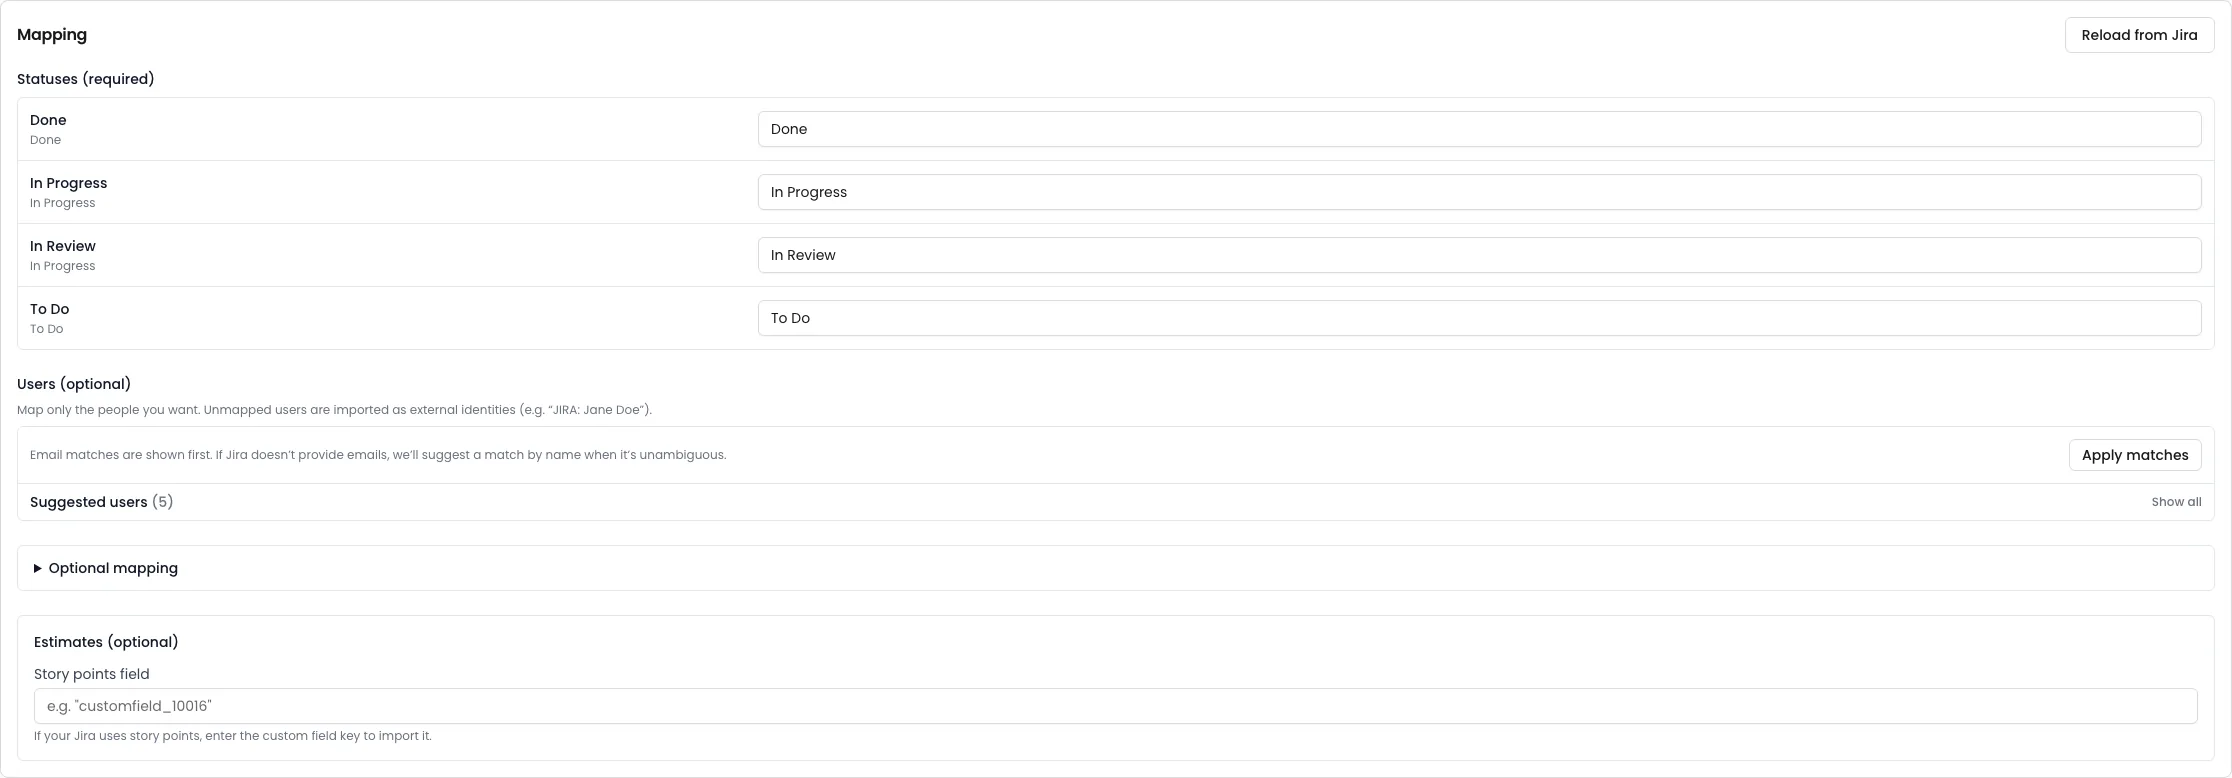
4) Map statuses and users
Keep the workflow readable by mapping Jira statuses to a smaller, clearer set.
5) Review the preview (then run the import)
Timelint shows a preview so you can confirm totals and mappings before starting the run.


A calm migration path
- Import active projects first
- Trim unused fields
- Standardise statuses
- Roll out the portal to clients
Use the checklists and guides
If you want a structured plan, use the resources linked on the Import page:
- Jira import checklist
- field mapping guide
- workflow simplification guide
- client portal rollout checklist
See: